This section is only used for FluxStore Pro or FluxStore WooCommerce product. Please skip this topic if you have not purchased this app.
If you prefer tutorial videos, please subscribe to our InspireUI Channel, press the notification icon to get notified when we release a new video and don't forget to give us a like if you find it useful.
| REFERENCE LINKS: | |
|---|---|
| Required Website | WooCommerce, Wordpress, PHP 7.x |
| Documents | WooCommerce API, Medium Blog, Youtube |
| Pre-config Website | https://github.com/inspireui/mstore |
| Required Plugins | MStore API Regenerate Thumbnails Options Importer WooCommerce |
| Demo or more info | Fluxstore Woocommerce |
- Make sure you have finished the Getting Started before starting.
- Visit Common Questions or Common Issues to find the solutions for your issues before asking for help.
1. Website Integration
This guide is used for the fresh Wodpress Installing, please follow these 5 easy steps and you are good to go (If you are using existing site, please make sure to backup the database before running the import):
Install and activeMstore API and WooCommerce plugins. Thenactivatethe license from Mstore API menu by using your Item Purchase Code from Envato.- Download Options Importer plugin file, then
upload and activethis plugin on your website (you can find it on the Internet but we recommend using the plugin we provided as we have already modified it to suit the requirement of our Apps) -
Download both Demo Options and Demo Products (If you wish to use your own products, you can skip the Demo Products file), then go it to Tools -> Import -> Run Importer(Options) and
uploadthe Demo Options file.
- Switch to
Specific Optionsand pressSelect Defaultsand make sure all of the woocommerce options are selected. - If you have already set up the WooCommerce settings and you don't want any new changes to apply to your configuration, please uncheck the option
Override existing options. Otherwise, just leave it like that if your website is newly fresh or you are not sure about your WooCommerce Settings.
- Switch to
Importthe Demo Products using WooCommerce importer feature. Again, this step is optional.-
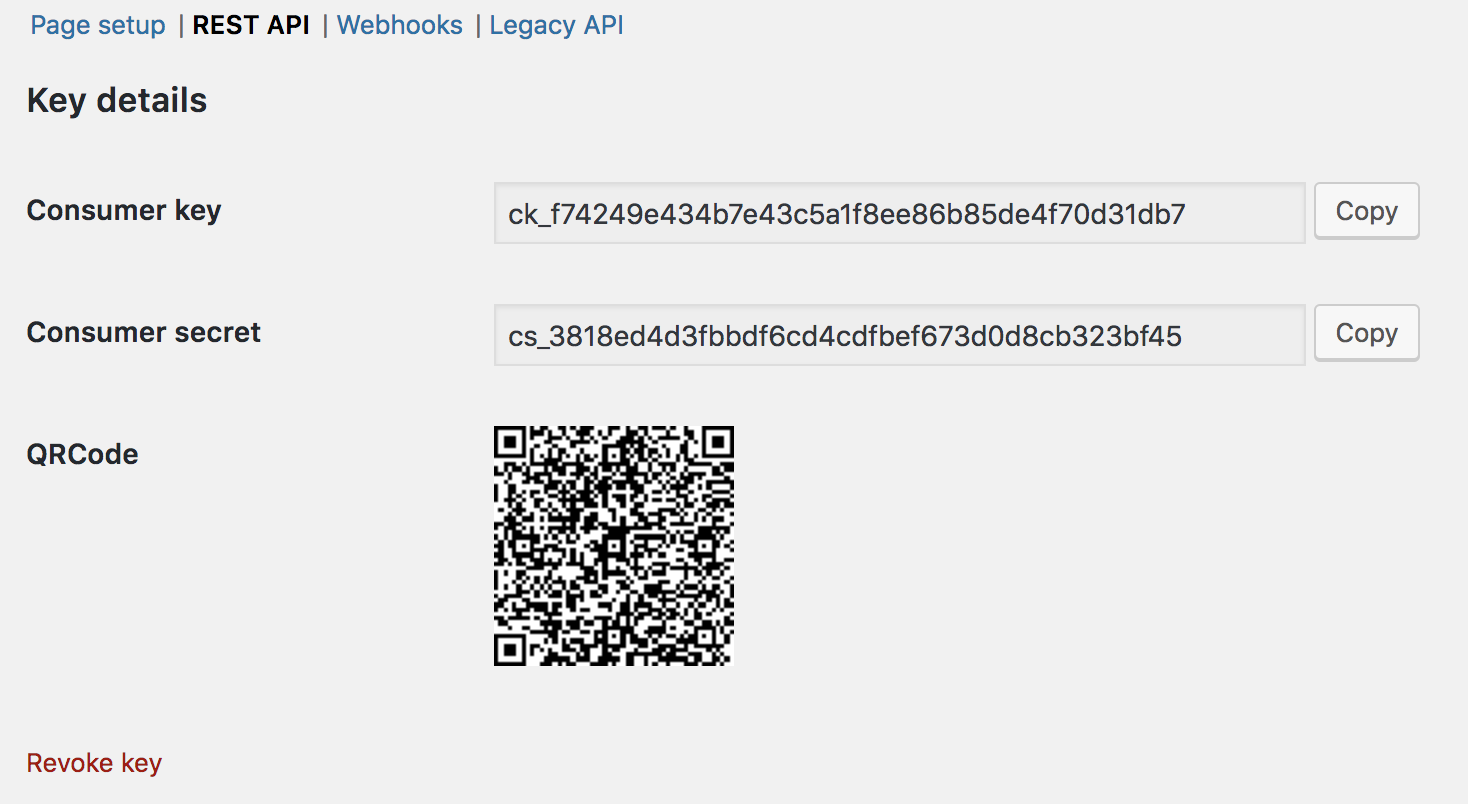
Generatethe WooCommerce REST API key and save them to your private file for later usage. Also go to Legacy API and enable the Enable the legacy REST API:
Checking the Rest API configuration:
- Access your website using the Rest API endpoint (your-domain/wp-json/wc/v3), for example: https://wordpress.inspireui.com/wp-json/wc/v3
- If there is a list of ordered endpoints, then it works.
- If not, have a look at this guide: Setting up Rest API.


That's all. You can remove the Options Importer plugin and remember to use the Regenerate Thumbnails plugin when you are developing on real products.
2. App Integration
It's time to connect your FluxStore app to your website.
- Open
lib/common/config.dart. Change theurlto yourwebsite domain(e.g: http://demo.mstore.io). Then replace the consumerKey and consumerSecret you created in the previous section (Website Integration).
const serverConfig = {
  "type": "woo",
  "url": "http://demo.mstore.io",
  "consumerKey": "ck_b7594bc4391db4b56c635fe6da1072a53xxxxx",
  "consumerSecret": "cs_980b9edb120e15bd2a8b668cacc734f7xxxxx",
  "blog": "http://fluxstore.inspireui.com",
  "forgetPassword": "http://demo.mstore.io/wp-login.php?action=lostpassword"
};- Open
lib/config/config_xx.json, with xx is language, e.g.: if you use English, open configen.json. Under theHorizonLayoutis the setting to display the Homepage layout, replace thecategorywith your website's category ID (Click one of your categories on your website and look for tagID in the address bar)
"HorizonLayout": [
    {
      "layout": "bannerImage",
      "isSlider": true,
      "items": [
        {
          "category": 21,
          "image": "https://user-images.githubusercontent.com/1459805/59846818-12672e80-938b-11e9-8184-5f7bfe66f1a2.png",
          "padding": 15.0
        },
        {
          "category": 23,
          "image": "https://user-images.githubusercontent.com/1459805/60091575-1f12ca80-976f-11e9-962c-bdccff60d143.png",
          "padding": 15.0
        },
    ...
]
- If the product images are unable to display, please have a look at the Section 4: Setup the Regenerate Image plugin or using https instead. And make sure your products/posts have featured image added.
- If you are developing the site on local machine, make sure it is the local IP address or the
virtual host, and it can be reached from the simulator.
And that's that. Now you can start to work on customize your app. For more information on customizing your app, have a look at the menu at the end of this guide.
3. Advance Setup (Optional)
This section is optional, please skip this topic if you already had the websites. Follow the below video guide to setup the Woocommerce site on Localhost or DigitalOcean.
Download the pre-configured website and setup your local development without setting up the Wordpress website. Open the fluxstore product, copy and rename the lib/example/woocommerce/config_localhost.dart and lib/example/woocommerce/config_localhost.json to lib/common/config.dart lib/config/config_en.json
Localhost setup video guide
Host Provider setup (Digital Ocean)
4. Setup the Regenerate Image
At the first time installing Fluxstore app could cause missing Image or Image Loading quite slow issue, we coud fix by installing the Regenerate Image plugin. First, go to Setting -> Media, configure your preferred image sizes. This is our recommended settings - https://tppr.me/IbRvL
Secondly, go to Tools -> Regenerate Thumbnails and select the button Regenerate Thumbnails For All xx Attachements and wait for the process to complete.

Thirdly, to check the images if they correctly generated, go to Media and select any image files, then choose regenerate button. Now you can see if the image created with format xxx-small or xxx-medium or xxx-large files.

5. Next Step
Design:
- Logo, splash screen, color, symbol, font, filter, settings screen...,
- Tabbar, banner slider, simple listview, blog,...
Features:
- Multi payment - native and webview payment;
- Multi language - RTL, add new language, default language;
- Sign In - google, apple, sms, facebook, email;
- Auto fill address from map;
- Setting for Ads - Admob and Facebook Ads;
- Push notifications
Publish:
Go to App store or Google play change app icon, name, bundle ID, delivery.
- Others useful section - Improve performance, Development tips
- Get troubleshooting for the issue - Common Questions, Common Issues
- See more guide, go to the Install Checklist