This section is only used for FluxStore Prestashop product, please follow the steps below to start integrate with the Prestashop website.
You can subscribe to the Youtube InspireUI Channel, like, and press the bell icon to get notifications for free instructional videos.
| REFERENCE LINKS: | |
|---|---|
| Required Website | Prestashop1.7.x, PHP 7.x |
| Documents | Medium Blog, Youtube, Prestashop API |
| Demo Website | http://prestashop.inspireui.com |
| Required Plugins | Free Module is Included from the Downoad Package |
1. Getting started
Please make sure you have finished the Getting Started guide before go to next section.
When installing, if you get issue, please go to Common Questions or Common Issues to find the solutions.
2. Test default demo website
This section shows you the way to build Fluxstore Prestashop app with the demo Prestashop website.
Video guide: you can subscribe to the Youtube InspireUI Channel, like, and press the bell icon to get notifications for free instructional videos.
Manual Document:
After download and unzip the source code package, use Android Studio to open the project source folder.
- Click the
Get dependenciesorPackages getto install the libraries from pubspec.yaml file.
- Open the simulator to run iOS or Android.
- Then press the run button to start project (you can still open multi simulator at the same time).


⚠️ If you have any issues on this section, please see the Common Question guideline before posting to Support Ticket
If you have problem with basic Flutter try to view these videos:
3. Integrate with your own website
Step 1: Install Prestashop Custom API
Go to the Prestashop Admin select Module Manager > Select Upload a Module and select the module from the download Fluxstore package resource/Prestashop-extension/customapi.zip

Step 2: Enable the webservice
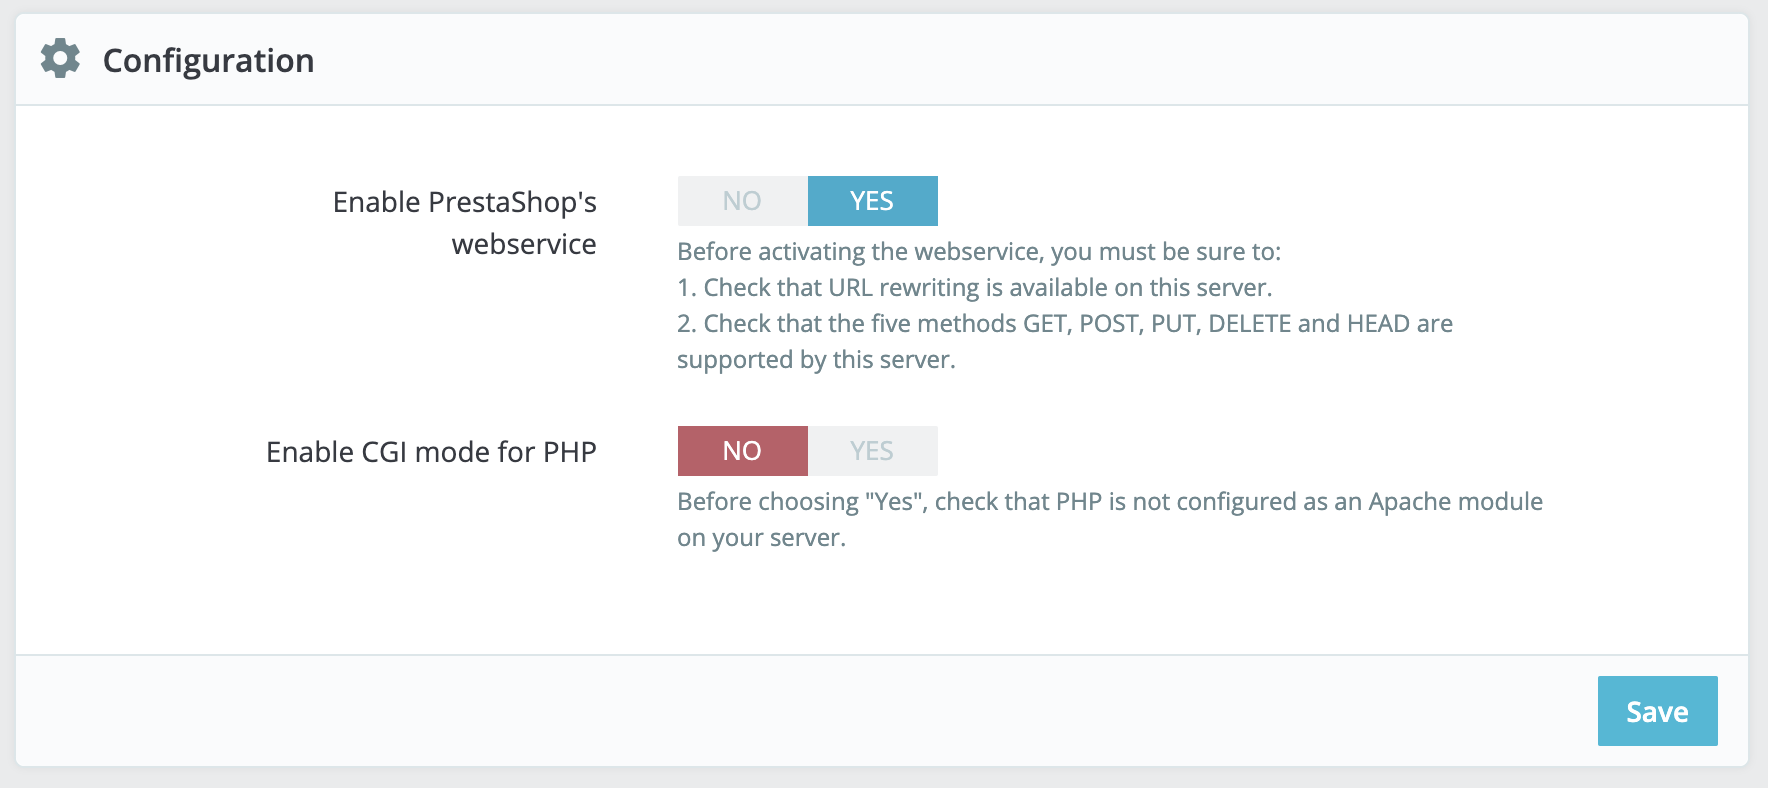
By default, the webservice feature is disabled on PrestaShop and needs to be switched on before the first use.
Go in the PrestaShop back office, open the “Web service” page under the “Advanced Parameters” menu, and then choose “Yes” for the “Enable PrestaShop Webservice” option.
In order to have access to the API you need to create an access key, this will allow you to finely tune the permissions you give to the different data of your shop. You will use this key later in each call to the API. Open the “Webservice” page under the “Advanced Parameters” menu, and then click the “Add new webservice key” button to access the account configuration section.
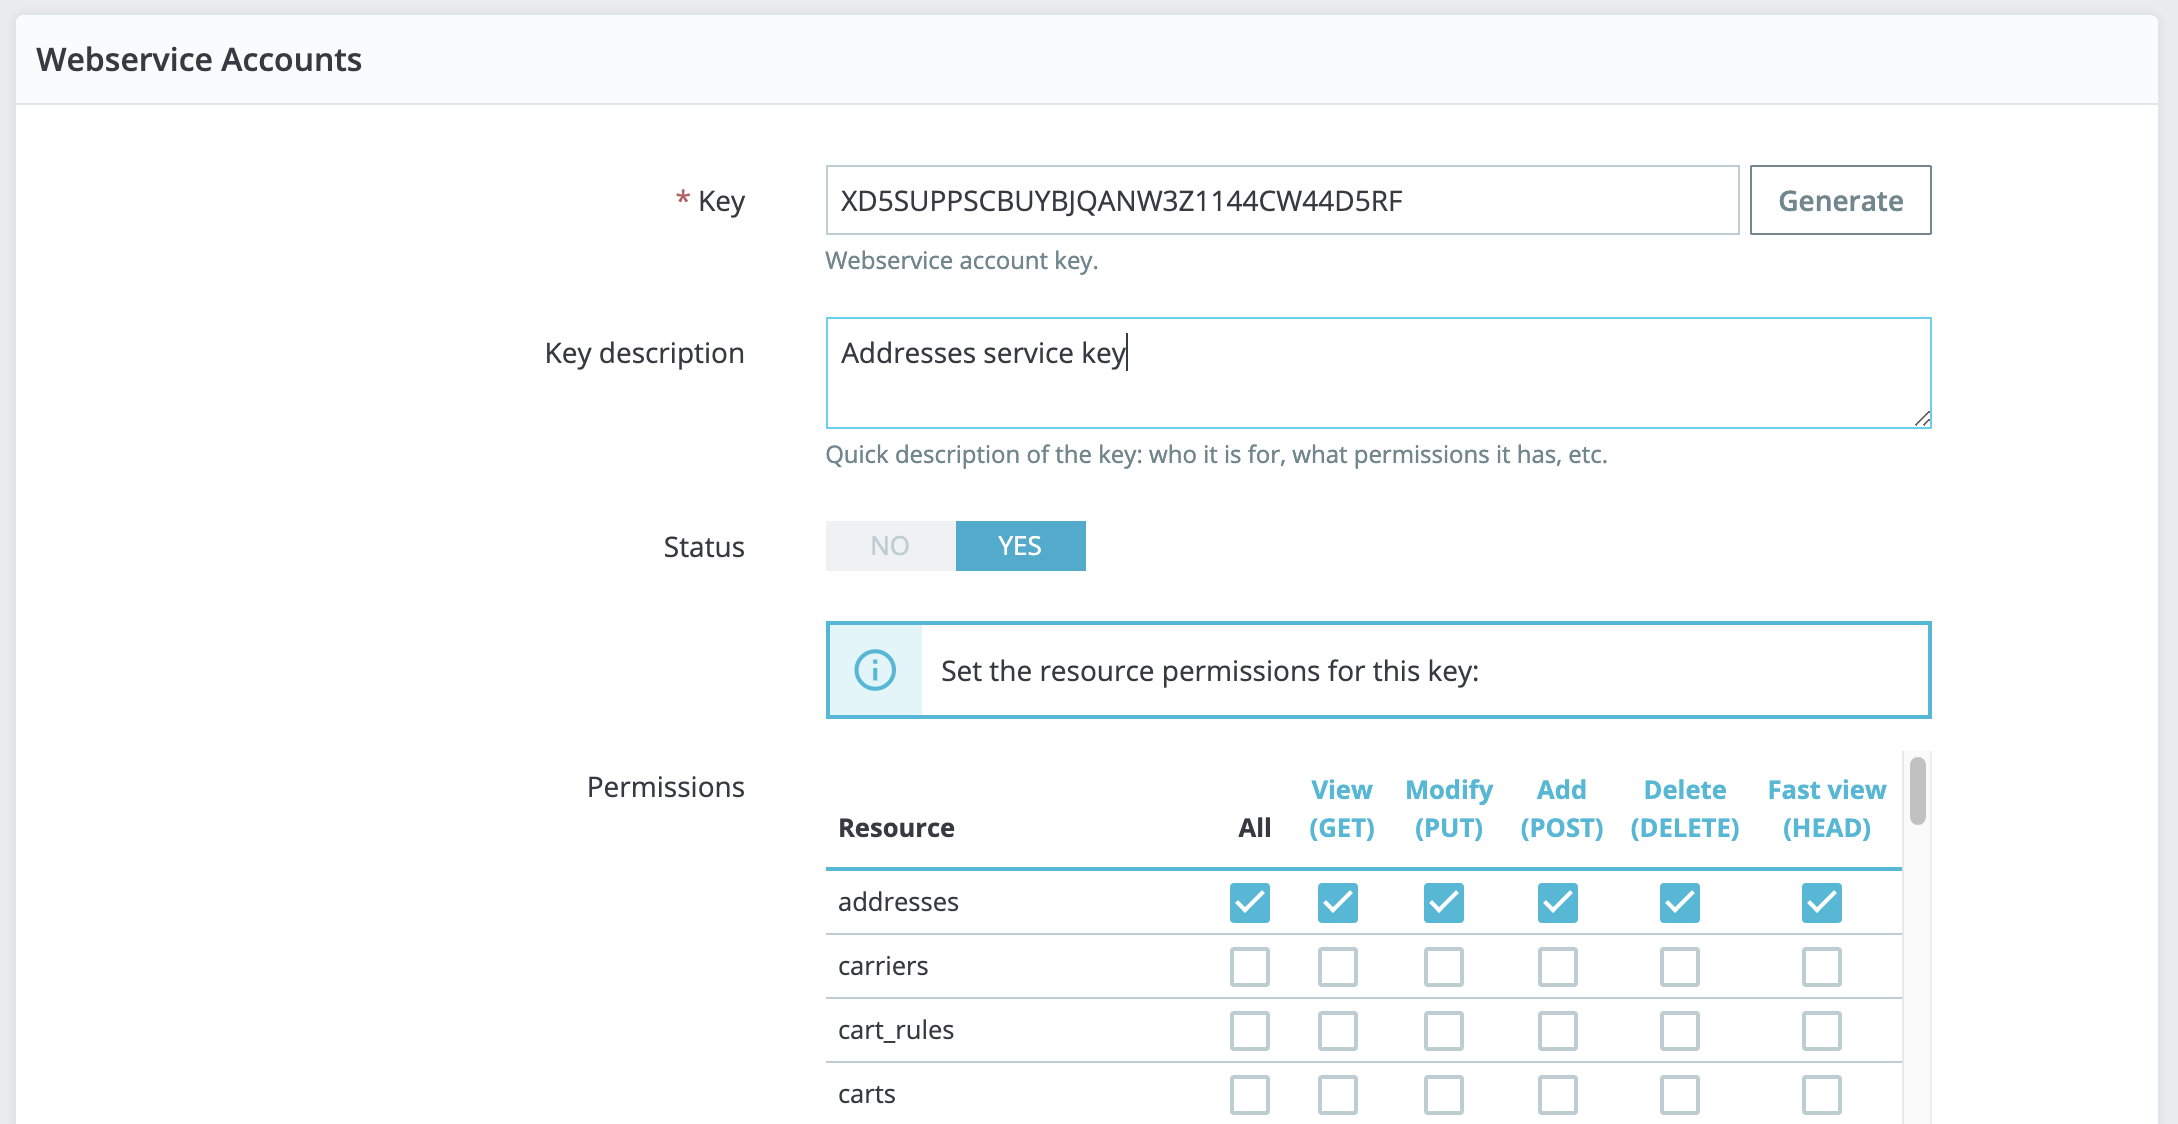
Each access key is defined by this information:
- Key - The API key serves as the main identifier for the webservice account you are creating. Click the “Generate” button to get an unique authentication key. You can also create your own (which must be 32 characters long), but using a generated key prevents wrong-doers from guessing your key too easily. Using this key, you and other selected users will be able to access the webservice.
- Key description - Helps you remember who you created that key for, what are the access rights assigned to it, etc. The description is not public, but make sure to put all the keywords pertaining to the user, so that you can find their key more quickly.
- Status - You can disable any key at any time.
- Permissions - This section is very important, as it enables you to assign rights for each resource you want to make available to this key. Indeed, you might want a user to have read and write access on some resources, but only read access on others – and no access to the more important ones. In the list of permissions, the top left checkbox enables you to define all the rights for a given resource. Likewise, the checkbox at the top of each column enables you to give the select right (View, Modify, etc.) to all the resources. Make sure to only select the rights needed for the usage of that key. Do not give all the rights for all resources to any key, keep that to yours and yours only.
Fore more detail about the Prestashop Service API, please refer to this guide
Step 3: Setup FluxStore
Copy the Key value from step 2. Open lib/common/config.dart and change the url from serverConfig section to your own website which has the API set:
const serverConfig = {
  "type": "presta",
  "url": "https://prestashop.inspireui.com",
  "key": "JC8CEY5ZXG61JZAXY7LLJXQJYHI3R6SJ"
};
Open lib/config/config_xx.json, with xx is language, e.g.: if you use English, open config_en.json. Under the HorizonLayout is the setting to display the homepage layout, replace the category with your own category ID (this ID can get when editting from the category in admin site):
"HorizonLayout": [
    {
      "layout": "bannerImage",
      "isSlider": true,
      "items": [
        {
          "category": 21,
          "image": "https://user-images.githubusercontent.com/1459805/59846818-12672e80-938b-11e9-8184-5f7bfe66f1a2.png",
          "padding": 15.0
        },
        {
          "category": 23,
          "image": "https://user-images.githubusercontent.com/1459805/60091575-1f12ca80-976f-11e9-962c-bdccff60d143.png",
          "padding": 15.0
        },
    ...
]
4. Next step
After integrating with your website successfully, you can customize your app as below. If no need, just skip them and go to publish.
Design:
- Logo, splash screen, color, symbol, font, filter, settings screen...,
- Tabbar, banner slider, simple listview, blog,...
Features:
- Multi language - RTL, add new language, default language;
- Setting for Ads - Admob and Facebook Ads;
- Push notifications
Publish to App store or Google play: change app icon, name, bundle ID, delivery.
- Others useful section - Improve performance, Development tips
- Get troubleshooting for the issue - Common Questions, Common Issues
- See more guide, go to the Install Checklist